Note: The keyboard shortcuts displayed in the illustrations and in the text are the default hotkeys. You can customize and set those as per your choice as described in detail in the Translation View topic. As a general rule, in MacOS the Cmd/Command key in Apple Keyboards is used instead of the Windows keyboard Control key. So, e.g., the Windows hotkey Ctrl+G is in MacOS (Apple keyboard) Cmd+G.
When you click to open a CTE translation task in TMS, CTE opens, displaying the Translation view.
![]()
You can have one task Collection open at the same time in the Translation view.
You can navigate the segments by using keyboard shortcuts:
The Translation view includes the following information on each Collection:
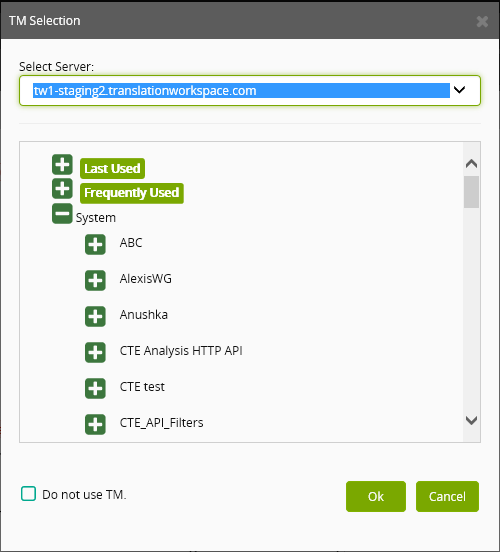
The top toolbar displays the TM Selector and the currently selected TM, the Comments indicator and the Submit button.

Clicking the TM Selector opens the TM Selection dialog, in which you can select a TM.
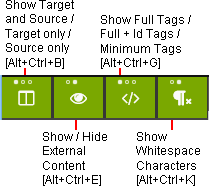
The main toolbar contains the following options which all affect what is displayed inside the source and target segments:
You can move any dialog to some other location onscreen by clicking the dialog top bar and dragging the dialog.
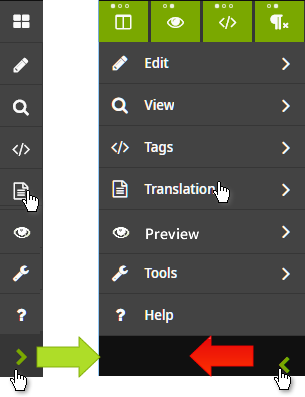
The Translation view main menu contains five option groups:

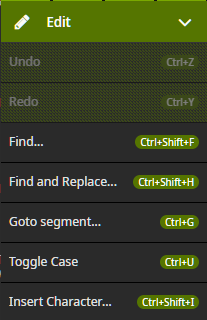
The Edit group contains commands used for editing the translation content.
The Edit group contains the following commands used inside the Collection and inside the target segment.
|
Option |
Description |
|---|---|
|
Undo [Ctrl+Z] |
Undoes the last action and reverts to the previous status. |
|
Redo [Ctrl+Y] |
Redoes the last preformed action. |
|
Cut [Ctrl+X] |
Removes the selected content (tag and text) from the segment view and inserts it to the clipboard. |
|
Copy [Ctrl+C] |
Copies the selected content (tag and text) from the segment view to the clipboard. |
|
Paste [Ctrl+V] |
Pastes the (from the segment view copied or cut) content of the clipboard to the current cursor location. |
|
Find [Ctrl+Shift+F] |
Opens the Find dialog for finding text. For more information, see the Finding and Replacing Content topic. |
|
Find and Replace [Ctrl+Shift+H] |
Opens the Find and Replace dialog for finding and replacing text. For more information, see the Finding and Replacing Content topic. |
|
Goto Segment [Ctrl+G] |
Opens the Goto Segment dialog for going to a specific segment by inserting the exact segment ID into the Goto field. For more information, see the Finding and Replacing Content topic. |
|
Toggle Case [Ctrl+U] |
Toggles the selected target segment characters between ALL CAPS, Uppercase, and lowercase characters. |
|
Insert Character [Ctrl+Shift+I] |
Opens the the Insert Character dialog listing the common special characters for inserting into the target segment. For more information, see the Inserting Characters topic. |
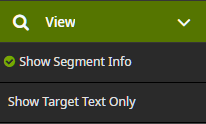
The View commands group contains two commands.
Selecting Show Segment Info displays or hides the match values. The option is enabled by default.
Selecting Show Target Text Only opens a separate browser tab which displays only the target segments of the current collection.
The Tags commands can be used to handle tags inside the target segment.
The Protect Tags [Ctrl+Shift+P] and the Combine Consecutive Tags options are enabled by default.
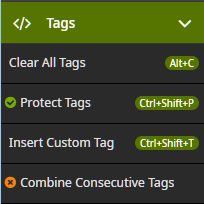
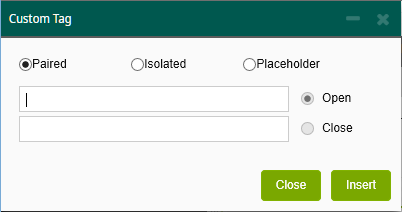
Insert Custom Tag [Ctrl+Shift+T] command displays the Insert Custom Tag dialog in which you can insert tags and placeholders not provided by matches from TMs.
The Translation commands sub-menu contains the command for running Concordance Search [Alt+Up] and the command for Terminology Search [Alt+Down].
![]()
 If a collection is created from one or more entire HTML, DOCX, PPTX, IDML (InDesign), or TXT files, you can preview it using the Preview menu options Show Source Preview [Alt+S] and Show Target Preview [Alt+T]. Source and target content preview are rendered in separate browser windows you can move to any location on screen for convenient comparison of content. You can refresh the target preview to reflect recent changes by selecting Refresh Target Preview [Shift+Alt+T] in the Preview menu.
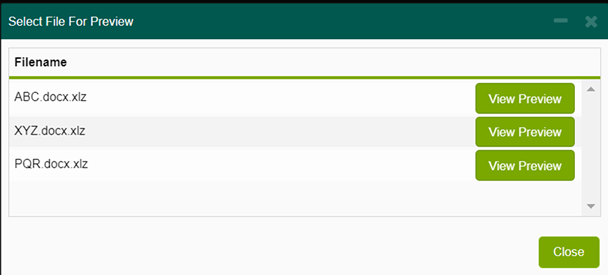
With the Prompt to select Filename for Multi-file preview setting in the User Preferences you can control how the file for preview is selected from a collection containing multiple files.
If this setting is ON, a dialog with a list of files is displayed where you can click View Preview to launch the preview for a file.
When the Prompt to select Filename for Multi-file preview setting is OFF, the preview of the file associated with the current segment is launched without displaying the filenames list. For example, if you selected a segment from the collection which belongs to file XYZ, the preview of file XYZ is launched without prompting the filenames list.
This setting is OFF by default.
Note: You cannot use the Preview functionality if any of the following conditions is true:
1) The collection is not based on one or more entire HTML, DOCX, PPTX, IDML (InDesign), or TXT files.
2) The collection is copy-protected.
3) The collection is configured to disallow previews.
4) The collection is not assigned to a TM.
With the Tools commands you can run the QA Check [F8] for the Collection, open the QA Check Configuration dialog, run Statistics for the Collection, run a Linguistic Toolbox (LTB) check for the collection, and set the Filename Filter.

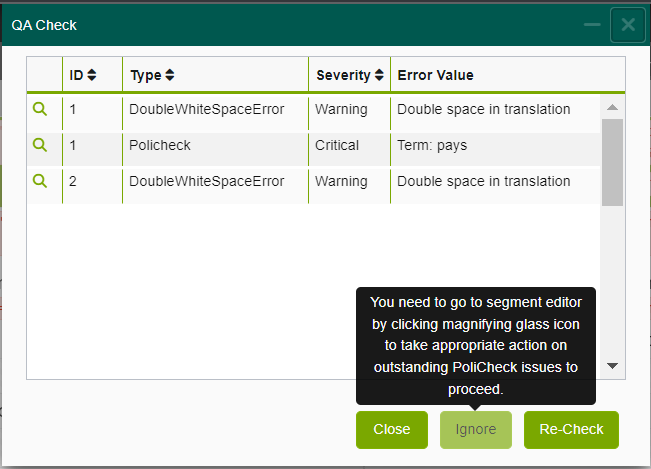
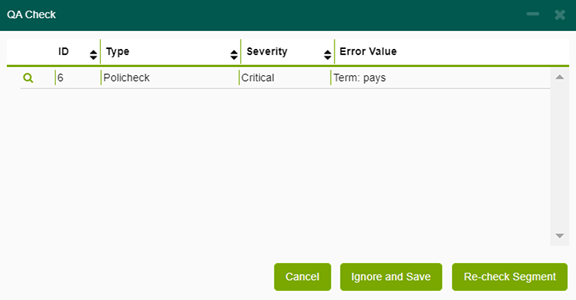
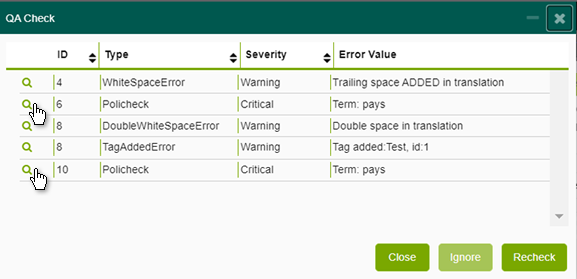
QA Interactive Check warns for any potential error when you save a segment:
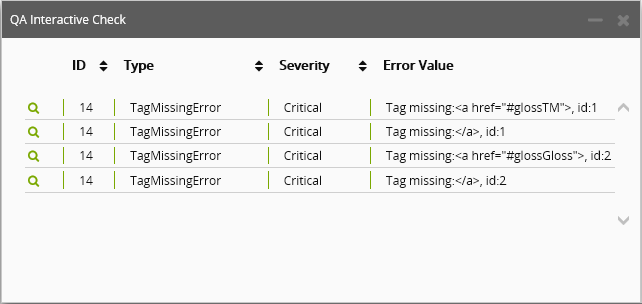
Click Close to close the dialog.
Click Ignore to ignore the warning or error.
Click Recheck to recheck the segment (after correcting the error).
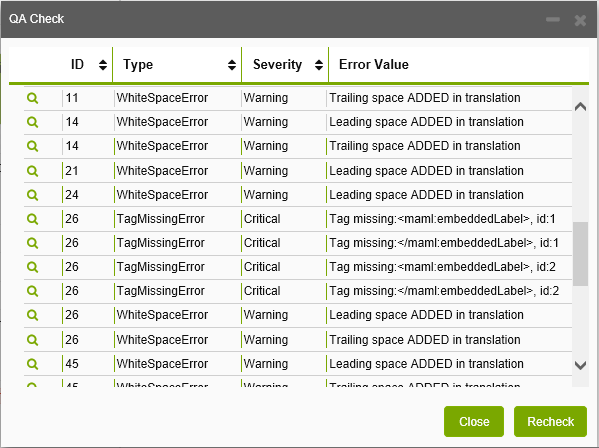
By running the QA Check you can get information on the possible errors included in the translations.
Note: When any outstanding PoliCheck QA issue exists in the collection, the Ignore button on the collector level QA issue displays a tooltip for taking appropriate action by clicking the magnifying glass icon and proceed in the segment editor.
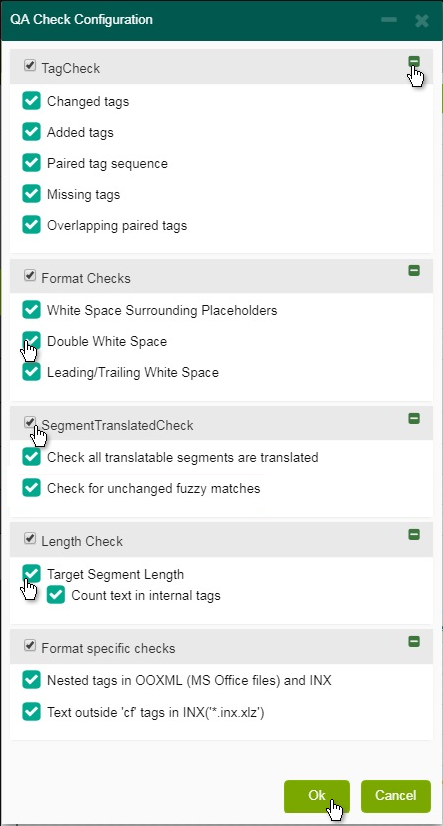
In the QA Check Configuration dialog you can set which checks are run during the QA Check.
The Microsoft PoliCheck API is integrated to CTE to scan translated segments in CTE collection content for sensitive geopolitical terms. PoliCheck is enabled by default for the CTE collections requiring this check.
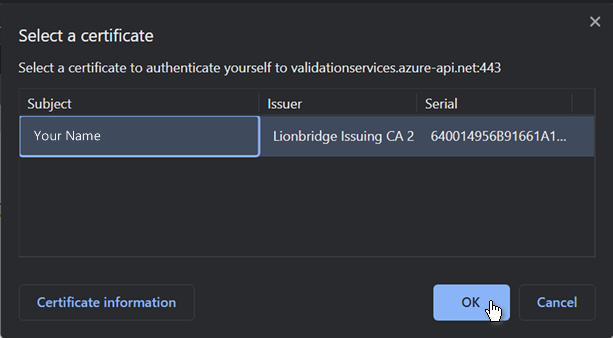
Note: When you use PoliCheck for the first time you may need to authenticate to the Microsoft PoliCheck service by clicking OK if prompted as displayed in the screen capture below.
When a target segment containing a sensitive geopolitical term is saved, the segment-level PoliCheck is triggered and displayed in the QA Check dialog.
After closing this dialog, all the flagged PoliCheck issues are displayed in the top half of the Segment Editor on blue background.
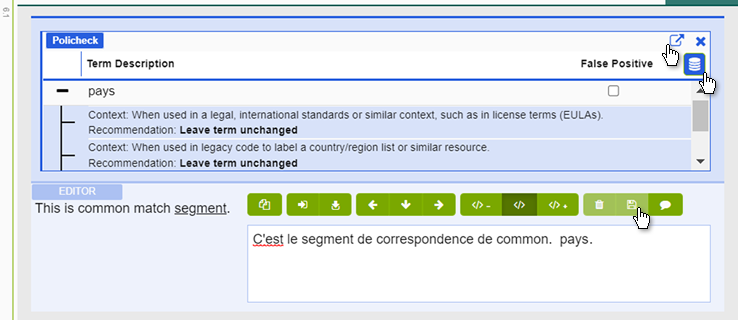
You can view the Context and Recommendation for the flagged terms by clicking on a term.
 If based on the recommendation you decide that the flagged term is appropriate for the context, you should mark it as a false positive by clicking the checkbox and then clicking the blue save button. This saves changes only to PoliCheck and you must still click the green "Save" button in the segment editor to save changes to the target segment.
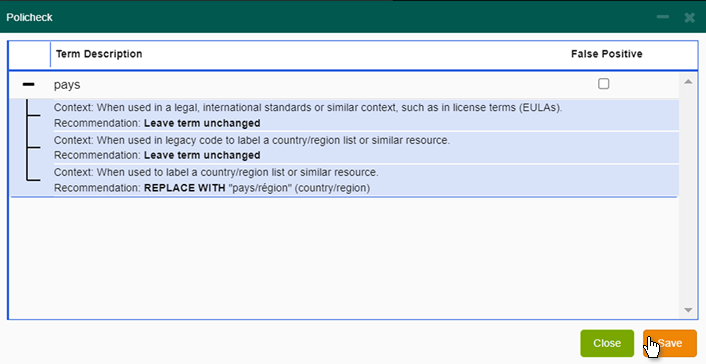
 Especially when several terms are flagged, you can also open the PoliCheck issues in a separate window by clicking the “Open in separate window” icon in the top right corner.
In the separate PoliCheck view you should mark the false positives as appropriate, and then click Save. If you click Close instead, all changes you made are discarded.
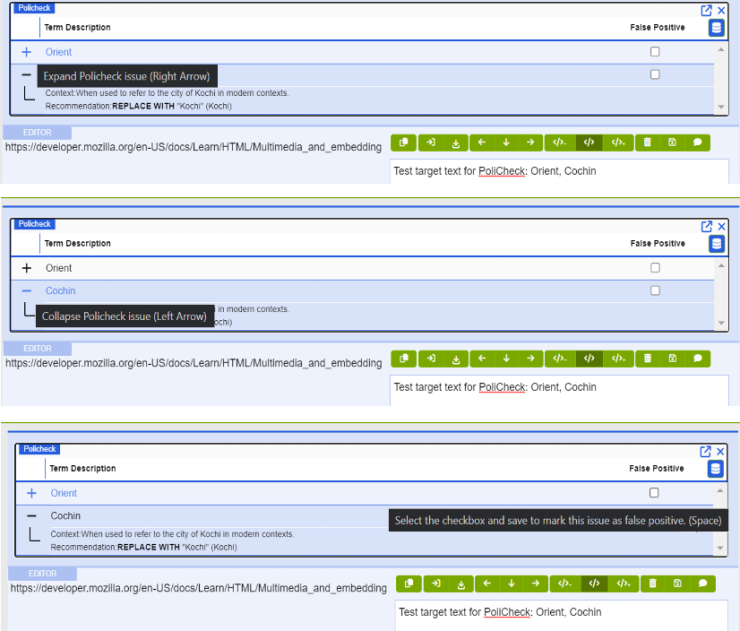
You perform the following PoliCheck operations by using keyboard shortcuts:
|
Description |
Option |
|---|---|
|
Go to previous PoliCheck issue. |
Up arrow [á] |
|
Go to next PoliCheck issue. |
Down arrow [â] |
|
Expand PoliCheck issue. |
Right arrow [à] |
|
Collapse PoliCheck issue. |
Left arrow [ß] |
|
Toggle PoliCheck issue False Positive state. |
Space bar |
|
Toggle focus between PoliCheck and Segment Editor. |
Find [Shift+Alt+P] |
CTE stores the Policheck data which indicates a false positive for retrieval when needed for subsequent analytic.
Collection level PoliCheck is triggered whenever you run the QA Check or when you click Submit. If there are any unaddressed PoliCheck issues present in any segment along with other QA check issues the collection-level QA check window is displayed.
You can click on the magnifying glass icon in the first column to jump to the respective segment to resolve the listed PoliCheck issue.
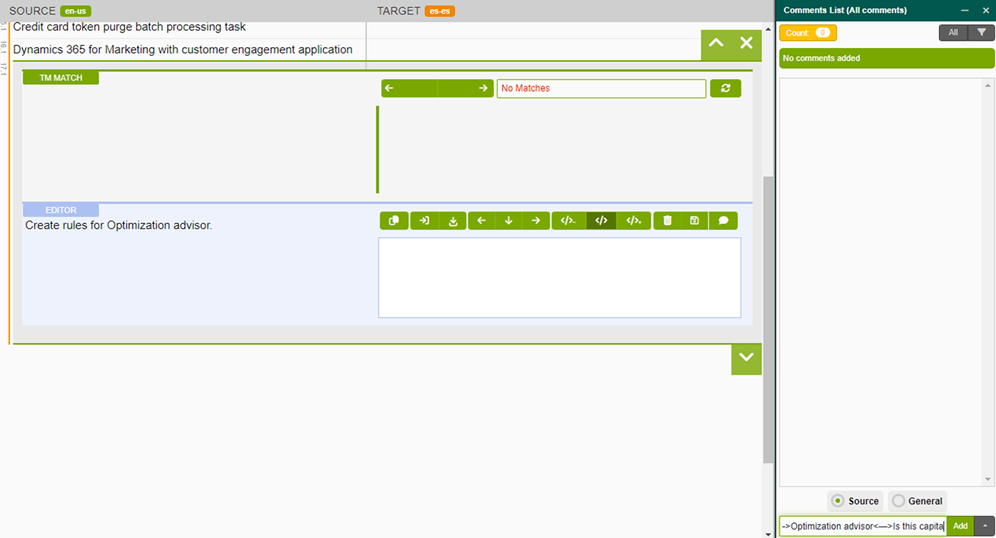
You can add annotations to the source or target segment if the Annotation feature is enabled for the current collection.
To use the CTE annotation feature by following the steps below .
1. Open segment.
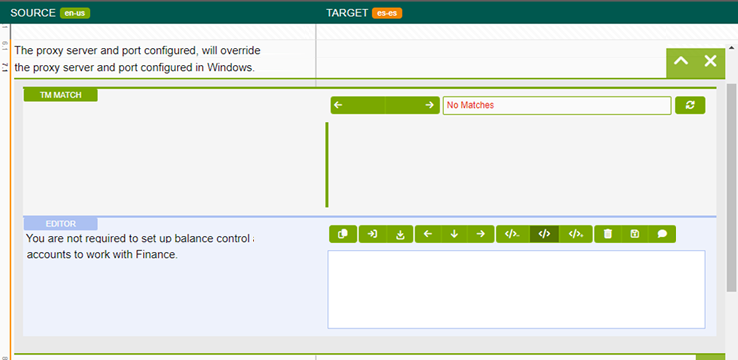
2. Select the word or phrase which needs to be annotated.
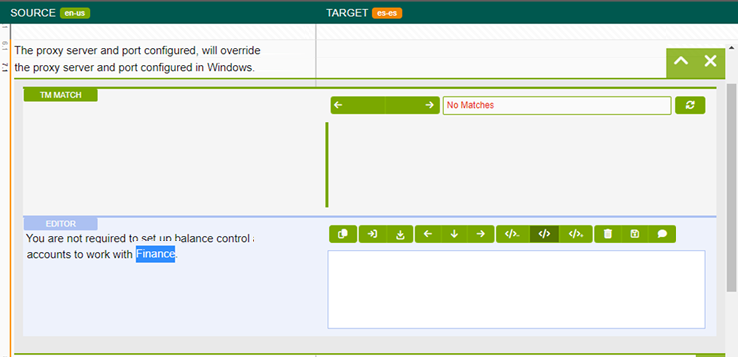
3. Click on the Comments icon or press Shift+Alt+C to launch the Add Annotation feature.
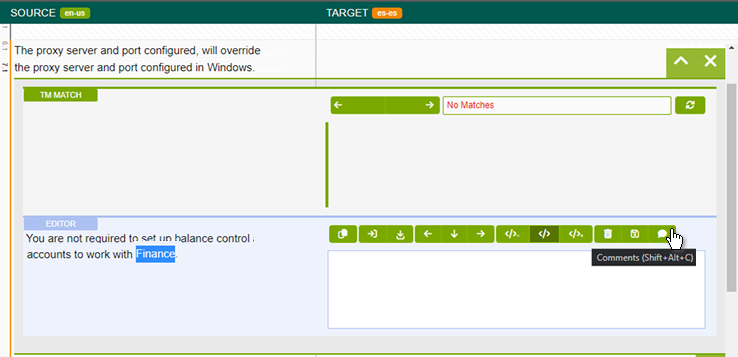
4. Select an annotation category from the list.

5. Clicking the Add button (or pressing Tab followed by Enter key) adds the annotation for the selected word or phrase in the below format:
Annotation category<—>Selected word or phrase<—>Additional user input (optional)
Example: Ambiguity – translatable vs. DNT<—>Finance<—>.

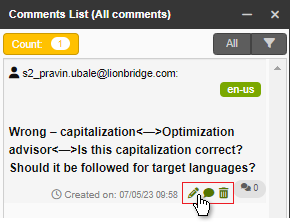
6. You can type in more details and explanations in the comment text box after the ending separator <—>.
Example:
Wrong – capitalization<—>Optimization advisor<—>Is this capitalization correct? Should it be followed for target languages?
Note: You can update or delete annotation details using the standard edit or delete actions for CTE Comments.
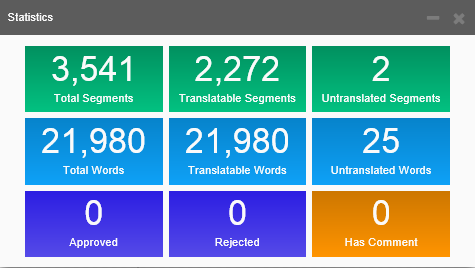
The Statistics window displays information on the current Collection.
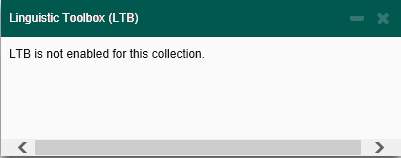
The Linguistic Toolbox check can be run only when LTB is enabled for the current collection. In such cases, when you select Linguistic Toolbox (LTB) in the Tools menu, the Linguistic Toolbox (LTB) dialog is displayed, and the Run LTB button is disabled.
When LTB is enabled for the collection, clicking the Run LTB button starts the LTB check.
Linguistic Toolbox creates a report on the current Collection, which can be opened or downloaded to your local computer for viewing. For more information, see the Linguistic Toolbox Check topic.
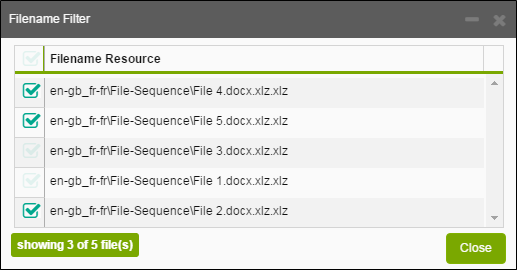
With the Filename Filter command you can open a dialog which lists all source files that make up the current collection. If multiple files are listed, you can select or deselect one or several of them to filter the collection view to display only segments from the selected files. If only one file is listed, the selecting and filtering functionality is disabled.
Note: The filter is in effect only when the window is open or minimized, so the collection reverts to displaying all segments when you close the Filename Filter window.
 .
.
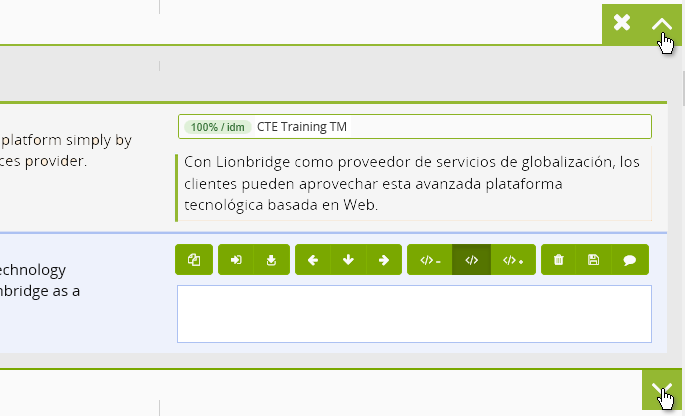
You can shrink and expand the Translation view menu by clicking the green arrow button at the bottom of the menu.
You can select the menu options also in the shrank menu.
Clicking on a segment opens it in the segment view in which you can edit the segment matches you get from the TMs by making changes to the target field text. When the TMs do not provide translation suggestions, you can fill the target field manually.
You can move to the next segment and browse back to the previous segment in the Collection by using the arrowhead buttons above and below the Segment Editor.
You can also navigate the matches from the TM with keyboard shortcuts:
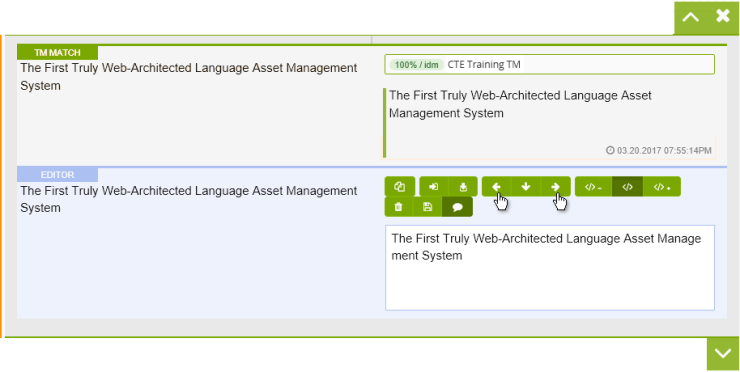
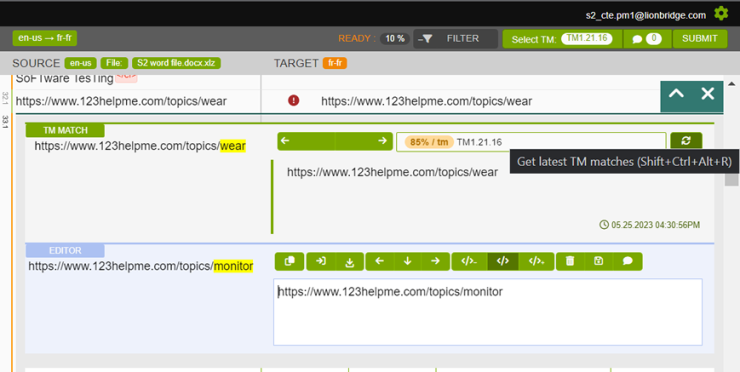
You can browse the matches provided by the linked TMs by using the buttons at the upper part of the Segment Pane.
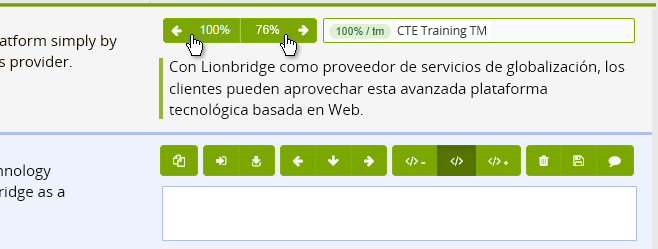
Note: Translations saved in the immediately preceding segments are not always automatically available. In such cases you can load saved TM matches by clicking Get latest TM matches button or using the keyboard shortcut [Shift+Ctrl+Alt+R].
You can edit the segment matches you get from the TMs by making changes to the text in the target field.
You can move to the next segment and browse back to the previous segment in the Collection by using the arrowhead buttons at the lower part of the Segment Editor.
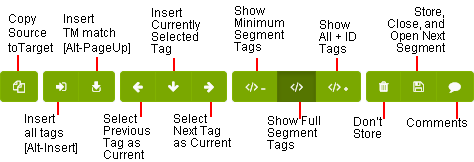
Segment Editor Toolbar includes commands you can use for editing the content of the open target segment during the review.
The toolbar provides the same options as while translating segments:
|
Option |
Description |
|---|---|
|
|
Copy source to Target copies the content from the current source segment to the current target segment. |
|
|
Insert all tags [Alt+Insert] inserts all tags from the current source segment to the current target segment. |
|
|
Insert TM match [Alt+PageUp] inserts the current TM match translation to the current target segment. |
|
|
Select Previous Tag as Current sets the previous tag as the current tag, so that you can insert it with the Insert Currently Selected Tag command into the current target segment. |
|
|
Insert Currently Selected Tag inserts the selected tag to the current target segment. |
|
|
Select Next Tag as Current sets the next tag as the current tag, so that you can insert it with the Insert Currently Selected Tag command into the current target segment. |
|
|
Show Minimum Segment Tags displays the tags inside the segment as minimized, numbered tag indicators. |
|
|
Show Full Segment Tags displays the tags inside the segment as full tags. |
|
|
Show All + ID Tags displays the tags inside the segments as full tags and also displays the ID numbers of the tags. |
|
|
Don't Store closes the segment with all the changes made while it was open, but does not store the into the TM. |
|
|
Store, Close and Open Next Segment stores the segment with all the changes made while it was open, closes it, and opens the next segment for editing. |
|
|
Comments displays the tags inside the segment as minimized. |
Selecting the Help command opens the CTE online help.

You can start translating a segment by double-clicking a segment on the Translation view. This opens the Segment pane inside the Translation view. You can find more information on translating in the Translating topic.


